

Choose a Model
Choose a model that best fits your task from your configured providers. After selection, you can adjust model parameters to control how it generates responses. Available parameters and presets vary by model.Write the Prompt
Instruct the model on how to process inputs and generate responses. Reference variables by typing/ or {.
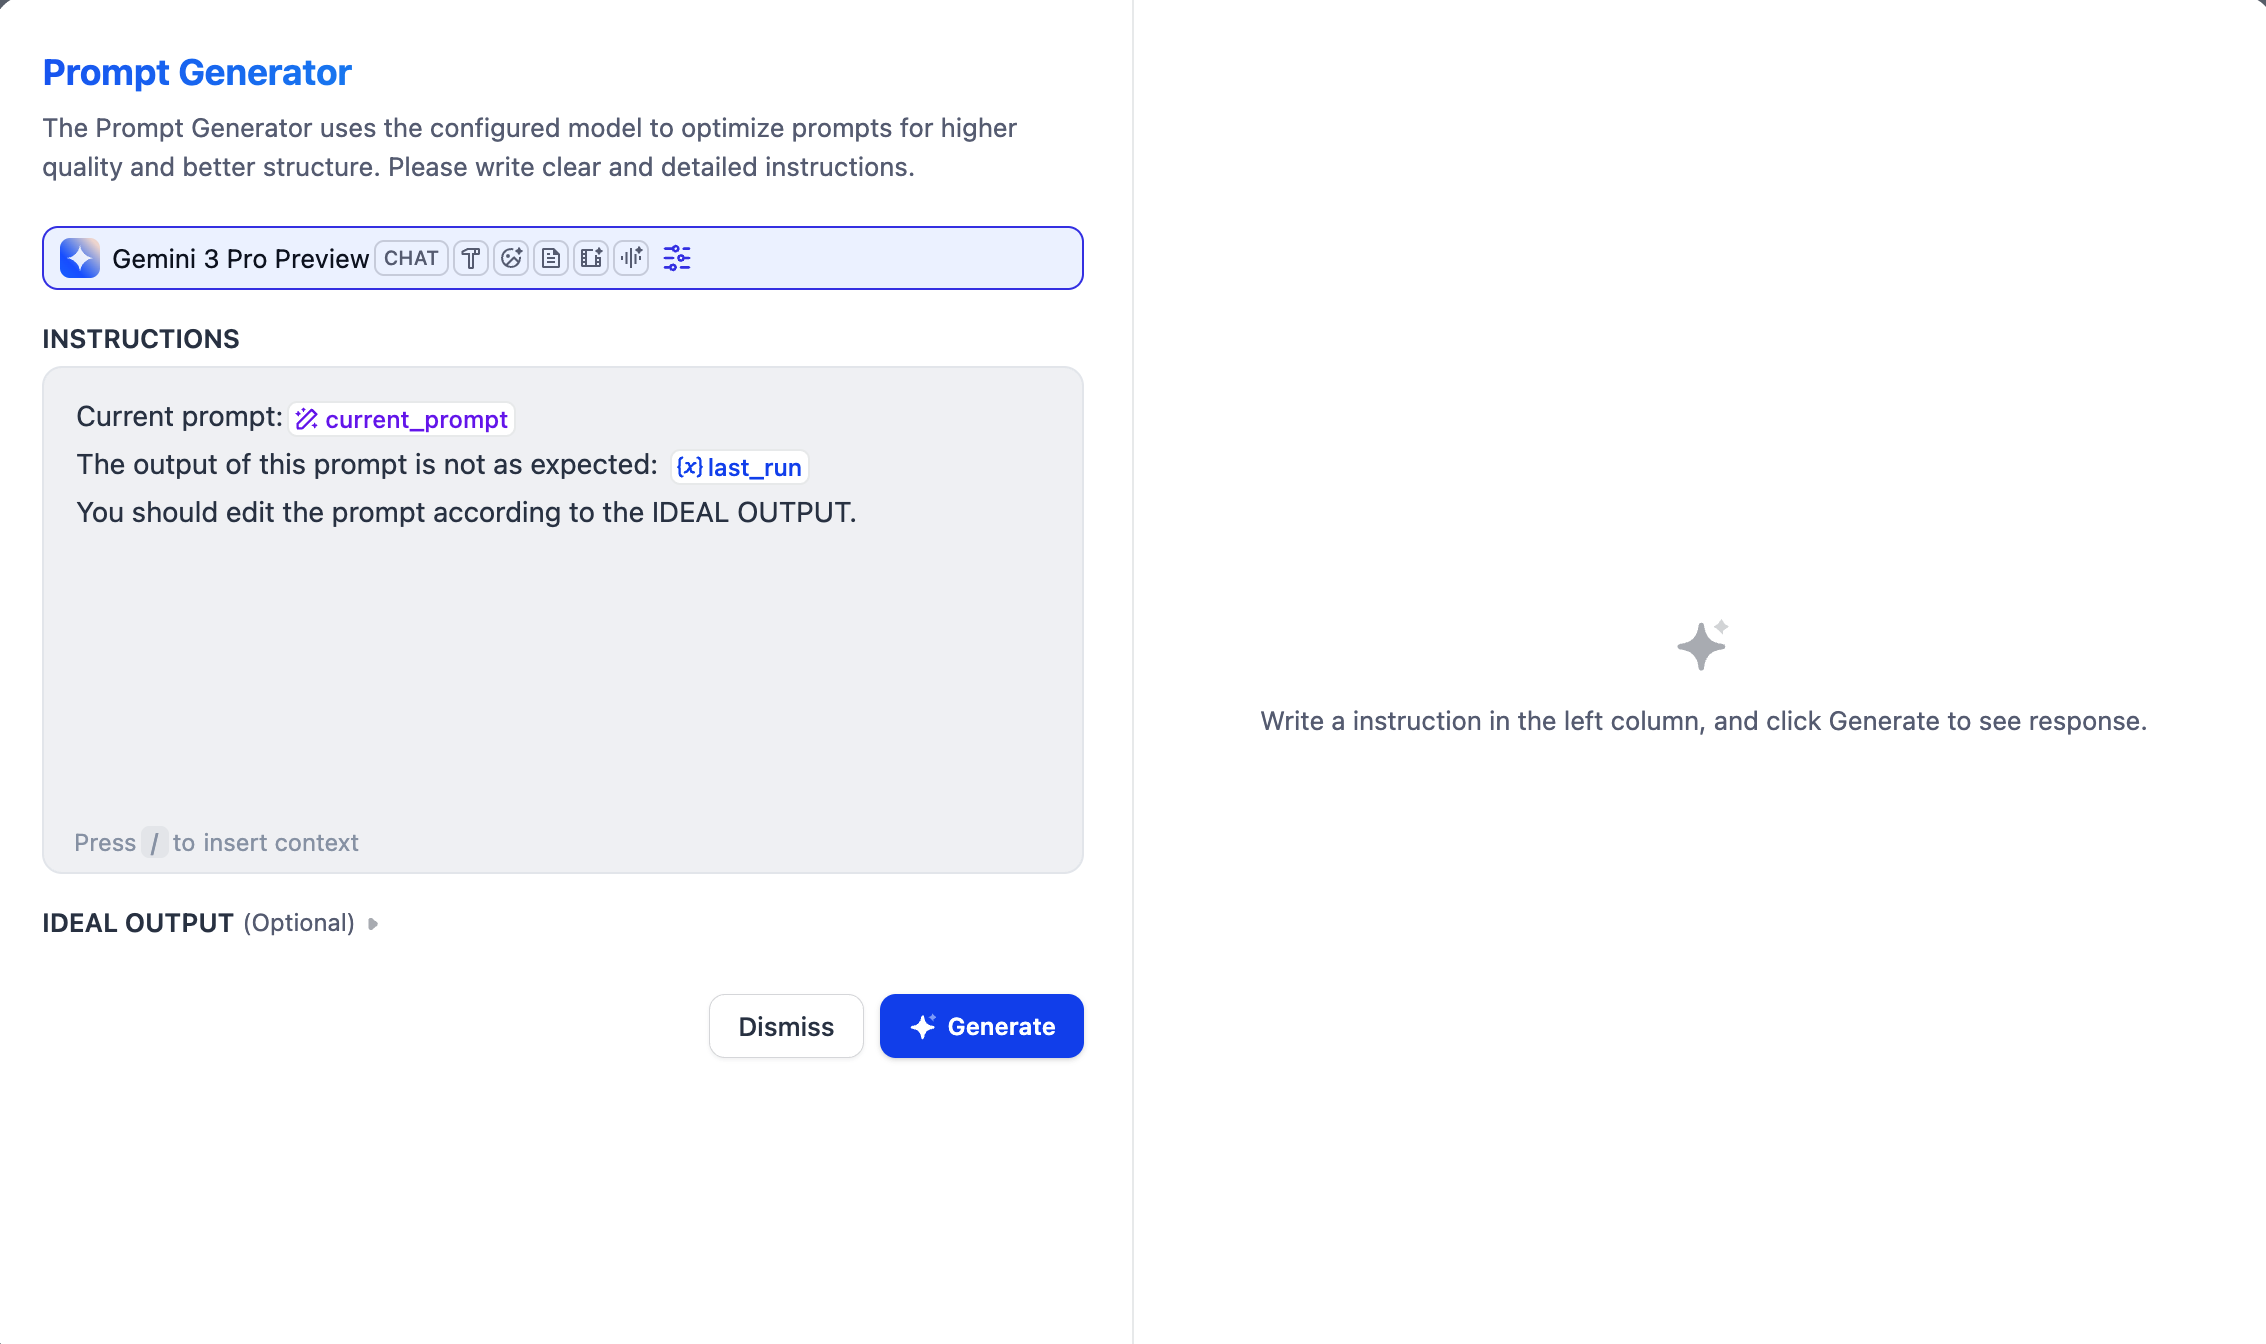
If you’re unsure where to start or want to refine existing prompts, try our AI-assisted prompt generator.
Specify Instructions and Messages
Define the system instruction and click Add Message to add user/assistant messages. They are all sent to the model in order in a single prompt. Think of it as chatting directly with the model:- System instructions set the rules for how the model should respond—its role, tone, and behavioral guidelines.
- User messages are what you send to the model—a question, request, or task for the model to work on.
- Assistant messages are the model’s responses.
Separate Inputs from Rules
Define the role and rules in the system instruction, then pass the actual task input in a user message. For example:Simulate Chat History
You might wonder: if assistant messages are the model’s responses, why would I add them manually? By adding alternating user and assistant messages, you create simulated chat history in the prompt. The model treats these as prior exchanges, which can help guide its behavior.Import Chat History from Upstream LLMs
Click Add Chat History to import chat history from an upstream Agent or LLM node. This lets the model know what happened upstream and continue from where that node left off. Chat history includes user, assistant, and . You can view it in an Agent or LLM node’scontext output variable.
System instructions are not included, as they are node-specific.
- Without importing chat history, a downstream node only receives the upstream node’s final output, with no idea how it got there.
- With imported chat history, it sees the entire process: what the user asked, what tools were called, what results came back, and how the model reasoned through them.
Example: Chain Research and Report LLMs
Example: Chain Research and Report LLMs
Suppose two LLM nodes run in sequence: LLM A researches a topic by calling search tools, and LLM B writes a report based on the research.If LLM B only receives LLM A’s final text output, it can summarize the conclusions but can’t verify them or cite specific sources. By importing LLM A’s chat history, LLM B sees the raw data from each tool call and can reference it directly in the report.Here’s the complete message sequence LLM B sees after importing LLM A’s chat history:LLM B understands: it has seen the research process (question, search, summary), and now needs to write a report based on that information—including the raw data it couldn’t access through the text output alone.
Create Dynamic Prompts Using Jinja2
Create dynamic prompts using Jinja2 syntax. For example, use conditionals to customize instructions based on variable values.Jinja2 Example: Conditional Prompt by User Level
Jinja2 Example: Conditional Prompt by User Level
Add Context
In Advanced Settings > Context, provide the LLM with additional reference information to reduce hallucination and improve response accuracy. A typical pattern: pass retrieval results from a knowledge retrieval node for Retrieval-Augmented Generation (RAG).Enable Conversation Memory (Chatflows Only)
Memory is node-specific and doesn’t persist between different conversations.
5 keeps the last 5 user-query and LLM-response pairs.
Use Dify Tools
Only models with the Tool Call tag can use Dify tools.
Process Multimodal Inputs
To let multimodal-capable models process images, audio, video, or documents, choose either approach:- Reference file variables directly in the prompt.
-
Enable Vision in Advanced Settings and select the file variable there.
Resolution only controls the detail level for image processing:
- High: Better accuracy for complex images but uses more tokens
- Low: Faster processing with fewer tokens for simple images
Separate Thinking and Tool Calling from Responses
To get a clean response without the model’s thinking process and tool calls (if any), reference thetext output variable (with Enable Reasoning Tag Separation turned on) or generation.content.
The generations variable itself includes all intermediate steps alongside the final response.
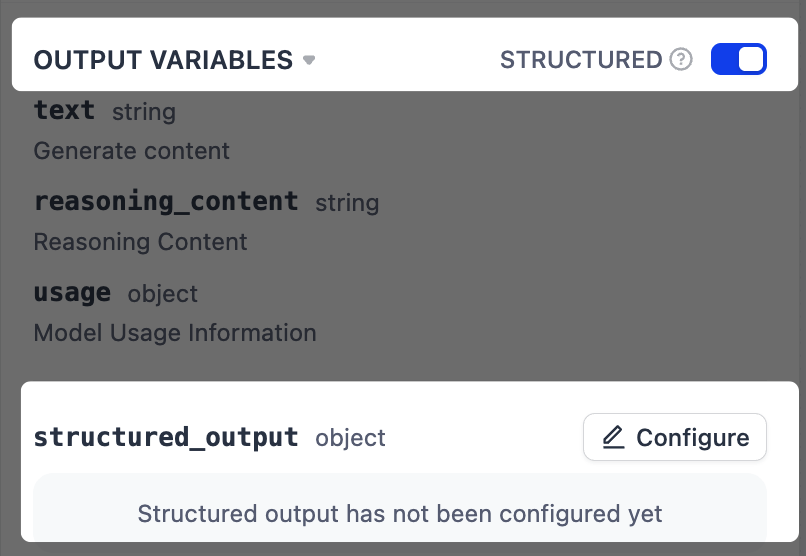
Force Structured Output
Describing an output format in instructions can produce inconsistent results. For more reliable formatting, enable structured output to enforce a defined JSON schema.For models without native JSON support, Dify includes the schema in the prompt, but strict adherence is not guaranteed.
-
Next to Output Variables, toggle on Structured. A
structured_outputvariable will appear at the end of the output variable list. -
Click Configure to define the output schema using one of the following methods.
- Visual Editor: Define simple structures with a no-code interface. The corresponding JSON schema is generated automatically.
- JSON Schema: Directly write schemas for complex structures with nested objects, arrays, or validation rules.
- AI Generation: Describe needs in natural language and let AI generate the schema.
- JSON Import: Paste an existing JSON object to automatically generate the corresponding schema.
Handle Errors
Configure automatic retries for temporary issues (like network glitches) and a fallback error handling strategy to keep the workflow running if errors persist.